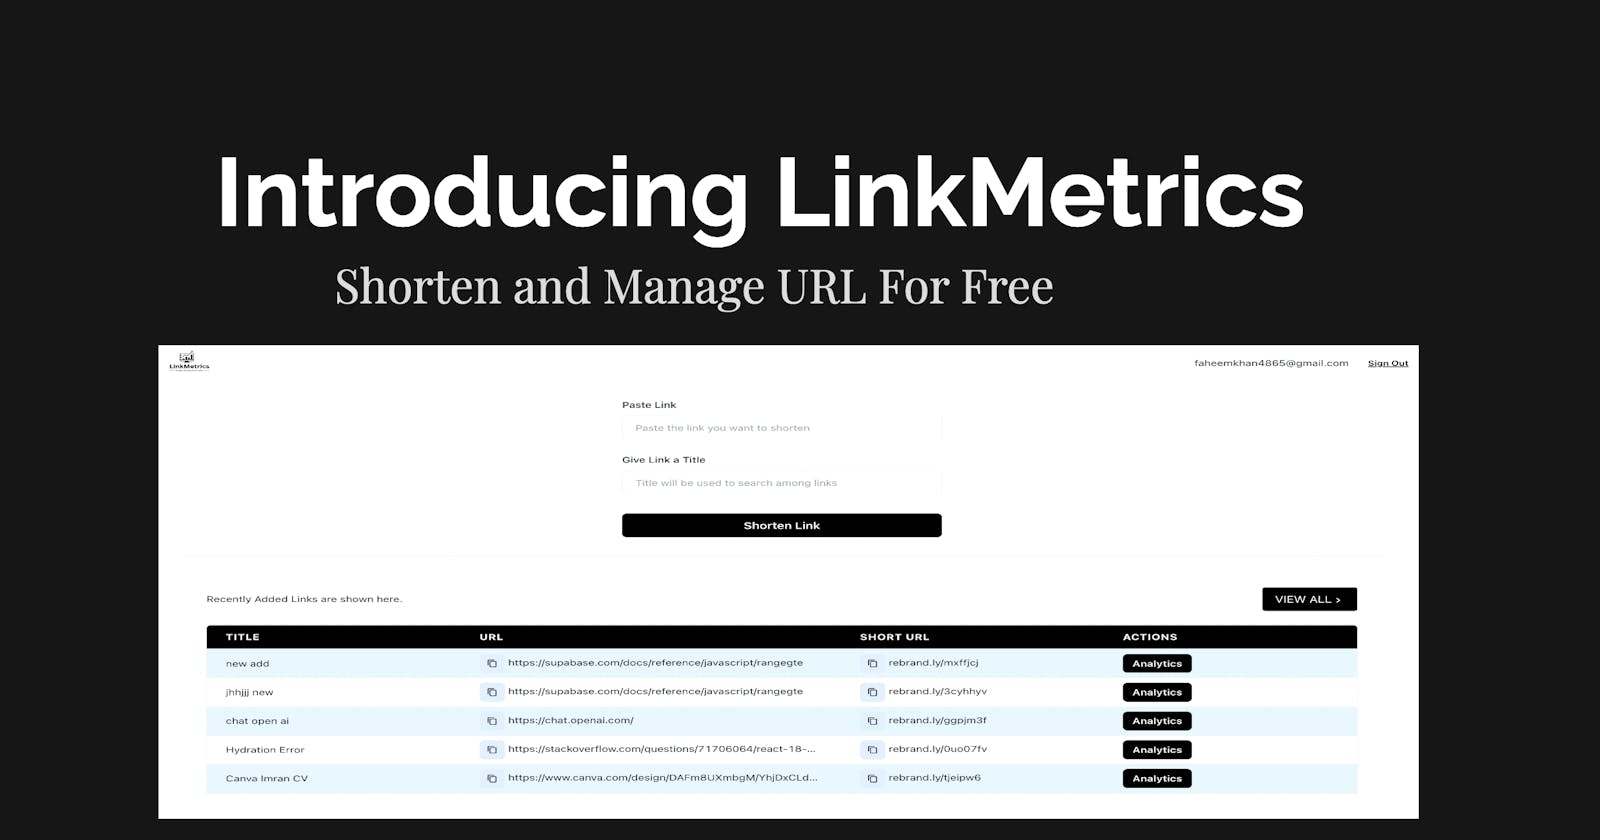
Introduction
Dear Readers,
I have built this Link Shortening and Management tool for the ongoing #1Password X Hashnode Hackathon. This tool is very convenient for creators and lifelong learners, aka Developers.
The Problem
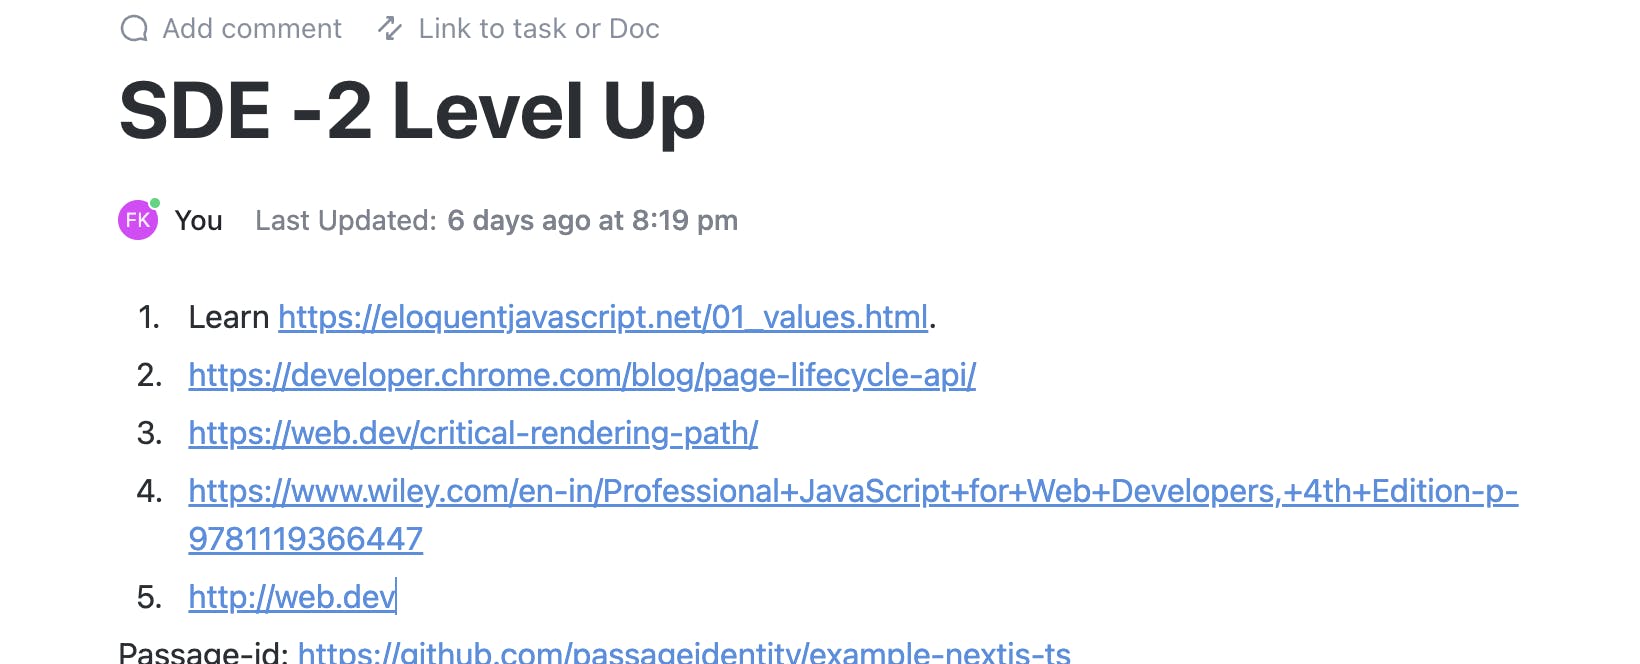
The project idea came the first time to my mind when I was planning to learn stuff to elevate my skills to a Senior Software Engineer. I was collecting article links from different platforms, and numerous posts shared by individuals on LinkedIn or Twitter. I collected the 30s of such resources ( Links ) but realize after a few days that, It is difficult to manage because I don't know what the particular link is about and why did I save it. Look at a Mess Below
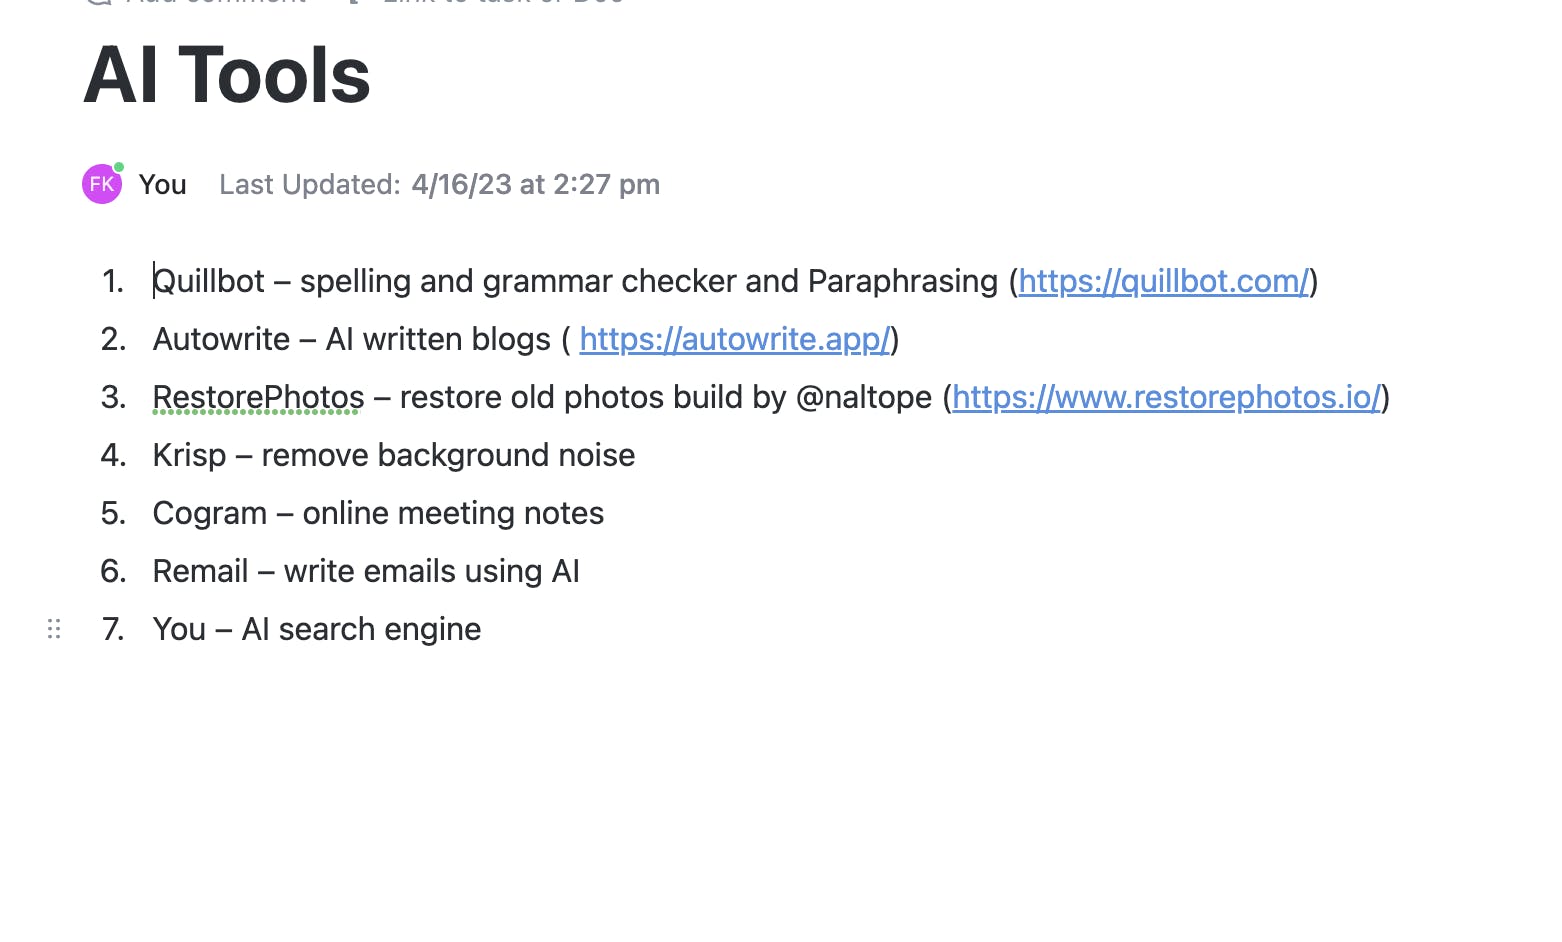
I am a content creator too. I have over 23k followers on Twitter where I share content regularly. So one day I was collecting useful AI tools to share with the audience and again I ended up writing labels for links but there was no way to Search, filter or Sort.
These two problems I wanted to solve and Hashnode and 1Password came up with a Hackathon contest at the right time.
The Begining
In the starting, I was looking for some resources that integrate the 1Password auth flow with some Databases like Supabase. My search ended up with this guide available there on Passage docs.
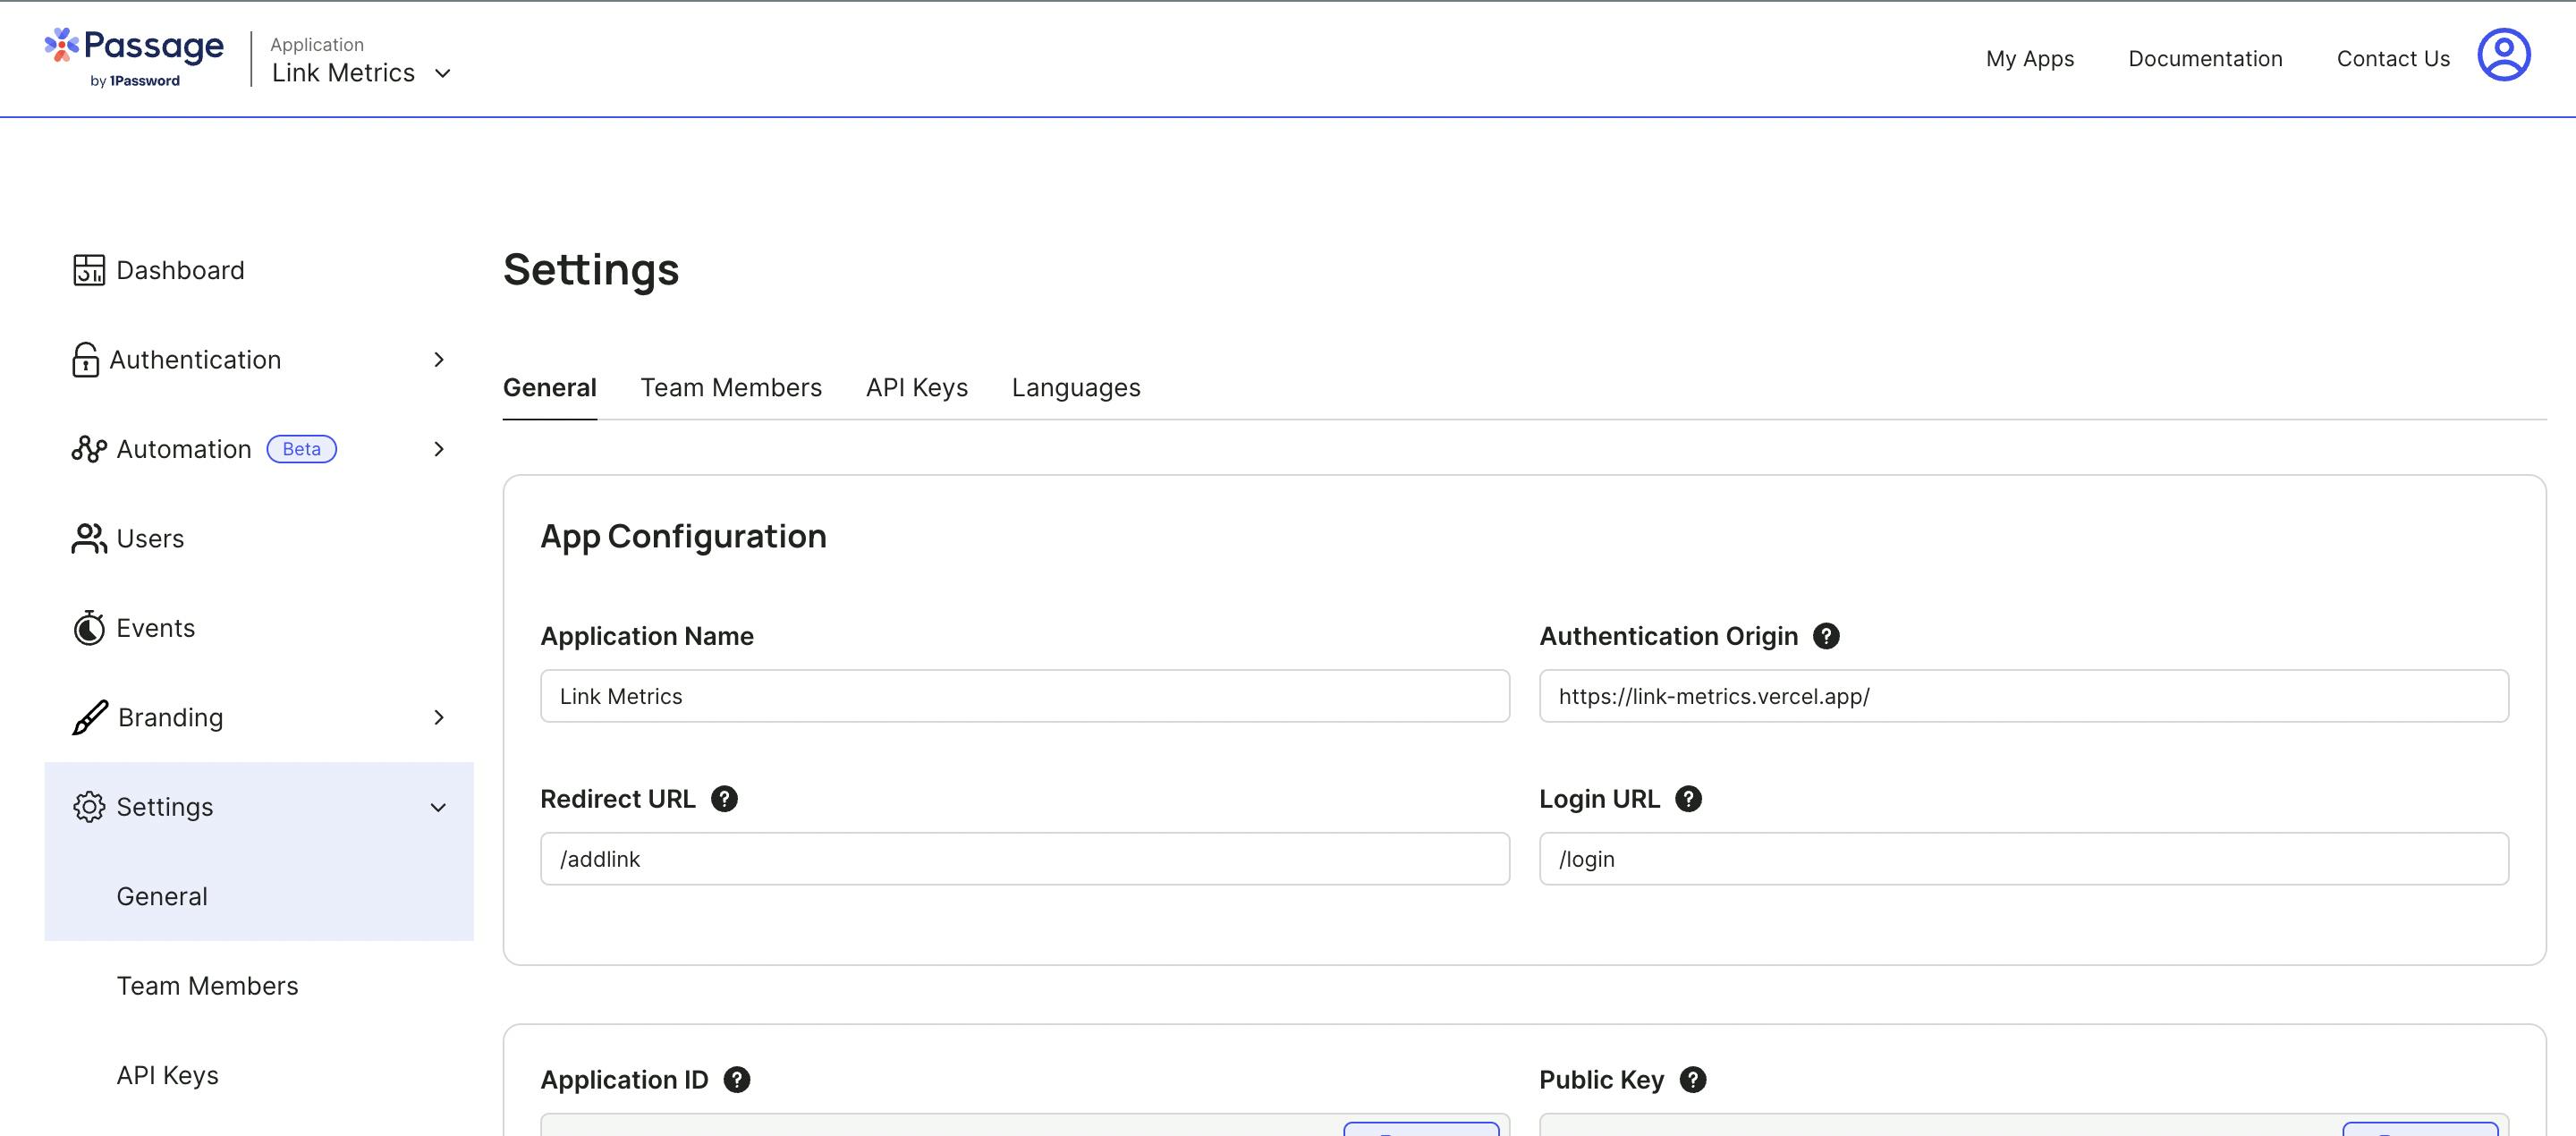
I sign up for passage here and set up a new app just in 10 minutes. Quickly as the steps were told in the docs.
Now, Start writing the code
The example repositories provided by the passage were of immense help me to write the code.
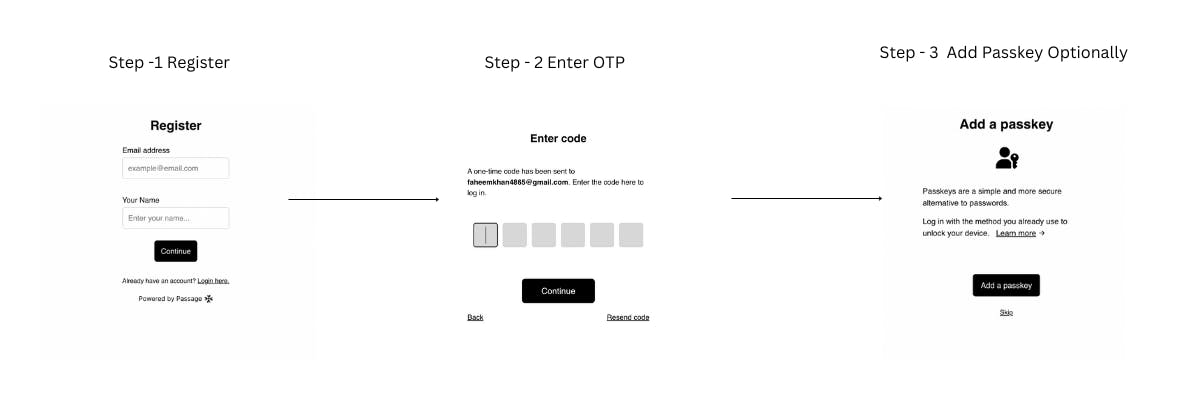
I integrated the OTP-based login with an option to add passkeys for devices just within an hour.
Shortnening and Adding Links
I used Rebrandly API to shorten URLs. For that I created an end-point in Next.js so that I use the API keys on the server, not exposing them to the client. From that end-point, I make calls to Rebrandly API and get shorted links and store them in the Supabase.
Here is the code.
import { NextApiRequest, NextApiResponse } from "next";
import { getSupabase } from "../../utils/supabase";
import axios from "axios";
import { headers } from "next/dist/client/components/headers";

export default async function handler(
  req: NextApiRequest,
  res: NextApiResponse
) {
  const reqMethod = req.method;
  if (reqMethod === "POST") {
    const { title, userId, link } = req.body;
    const { supabase } = getSupabase(userId);
    try {
      const newdata = await axios.post(
        "https://api.rebrandly.com/v1/links",
        {
          destination: link,
          title,
        },
        {
          headers: {
            apikey: process.env.REBRANDLY_API_TOKEN,
            Authorization: `Bearer ${process.env.REBRANDLY_API_TOKEN}`,
            "Content-Type": "application/json",
          },
        }
      );
      const { data, error } = await supabase
        .from("link")
        .insert({
          title: title,
          user_id: userId,
          long_url: link,
          short_url: newdata.data.shortUrl,
        })
        .select()
        .single();
      const resp = {
        data: {
          inserted: data,
          shortedLink: newdata.data,
        },
      };
      return res.status(200).json(resp);
    } catch (error) {
      console.log({ error });
      if (error) return res.status(500).json(error);
    }
  } else {
    return res
      .status(400)
      .json({ message: `HTTP method ${reqMethod} is not allowed` });
  }
}
The Add Link Page -
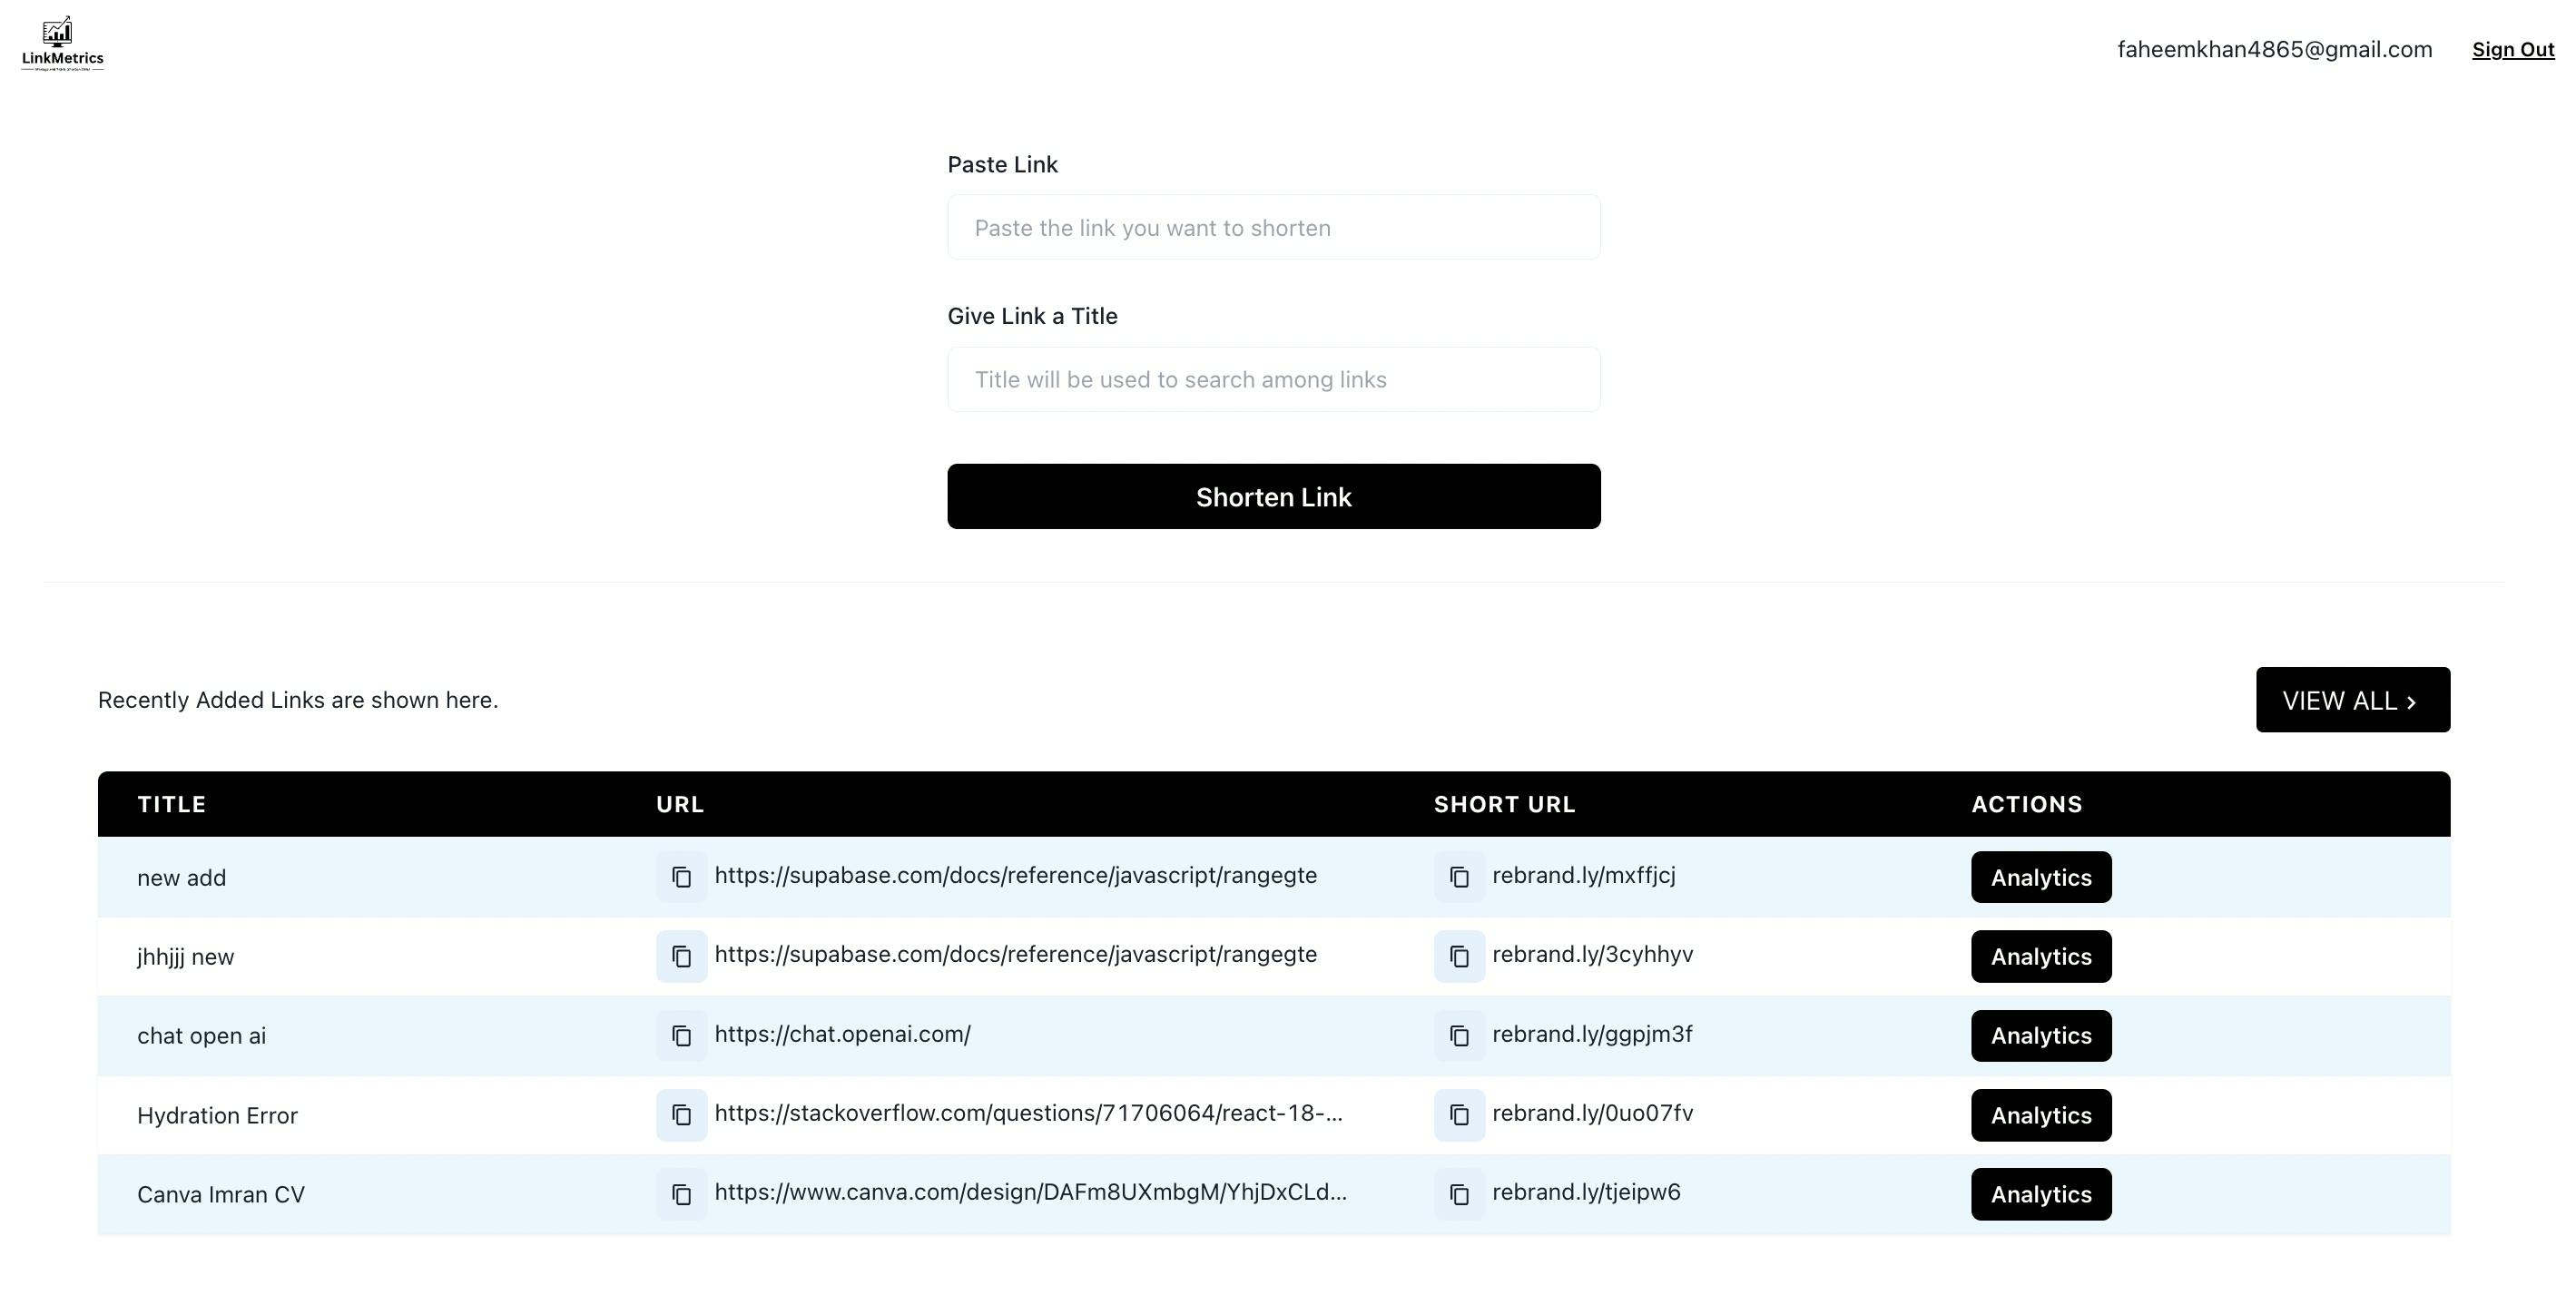
I created the UI to add and show the short links. I have a form to submit a title and a long URL. After that users click on the Shorten Link button. On click, I take the form data and post it to the above API endpoint.
The API returns a newly short link, which I append immediately at the top of the table shown below of the add form, making a great user experience.
The Dashboard Page
We needed a full-fledged dashboard to enable users to search, filter and sorting of their links.
Typing in the search title input box will trigger the search automatically. I have used the debounce technique to make API calls only when a user stops typing for a while ( 600ms in this case).
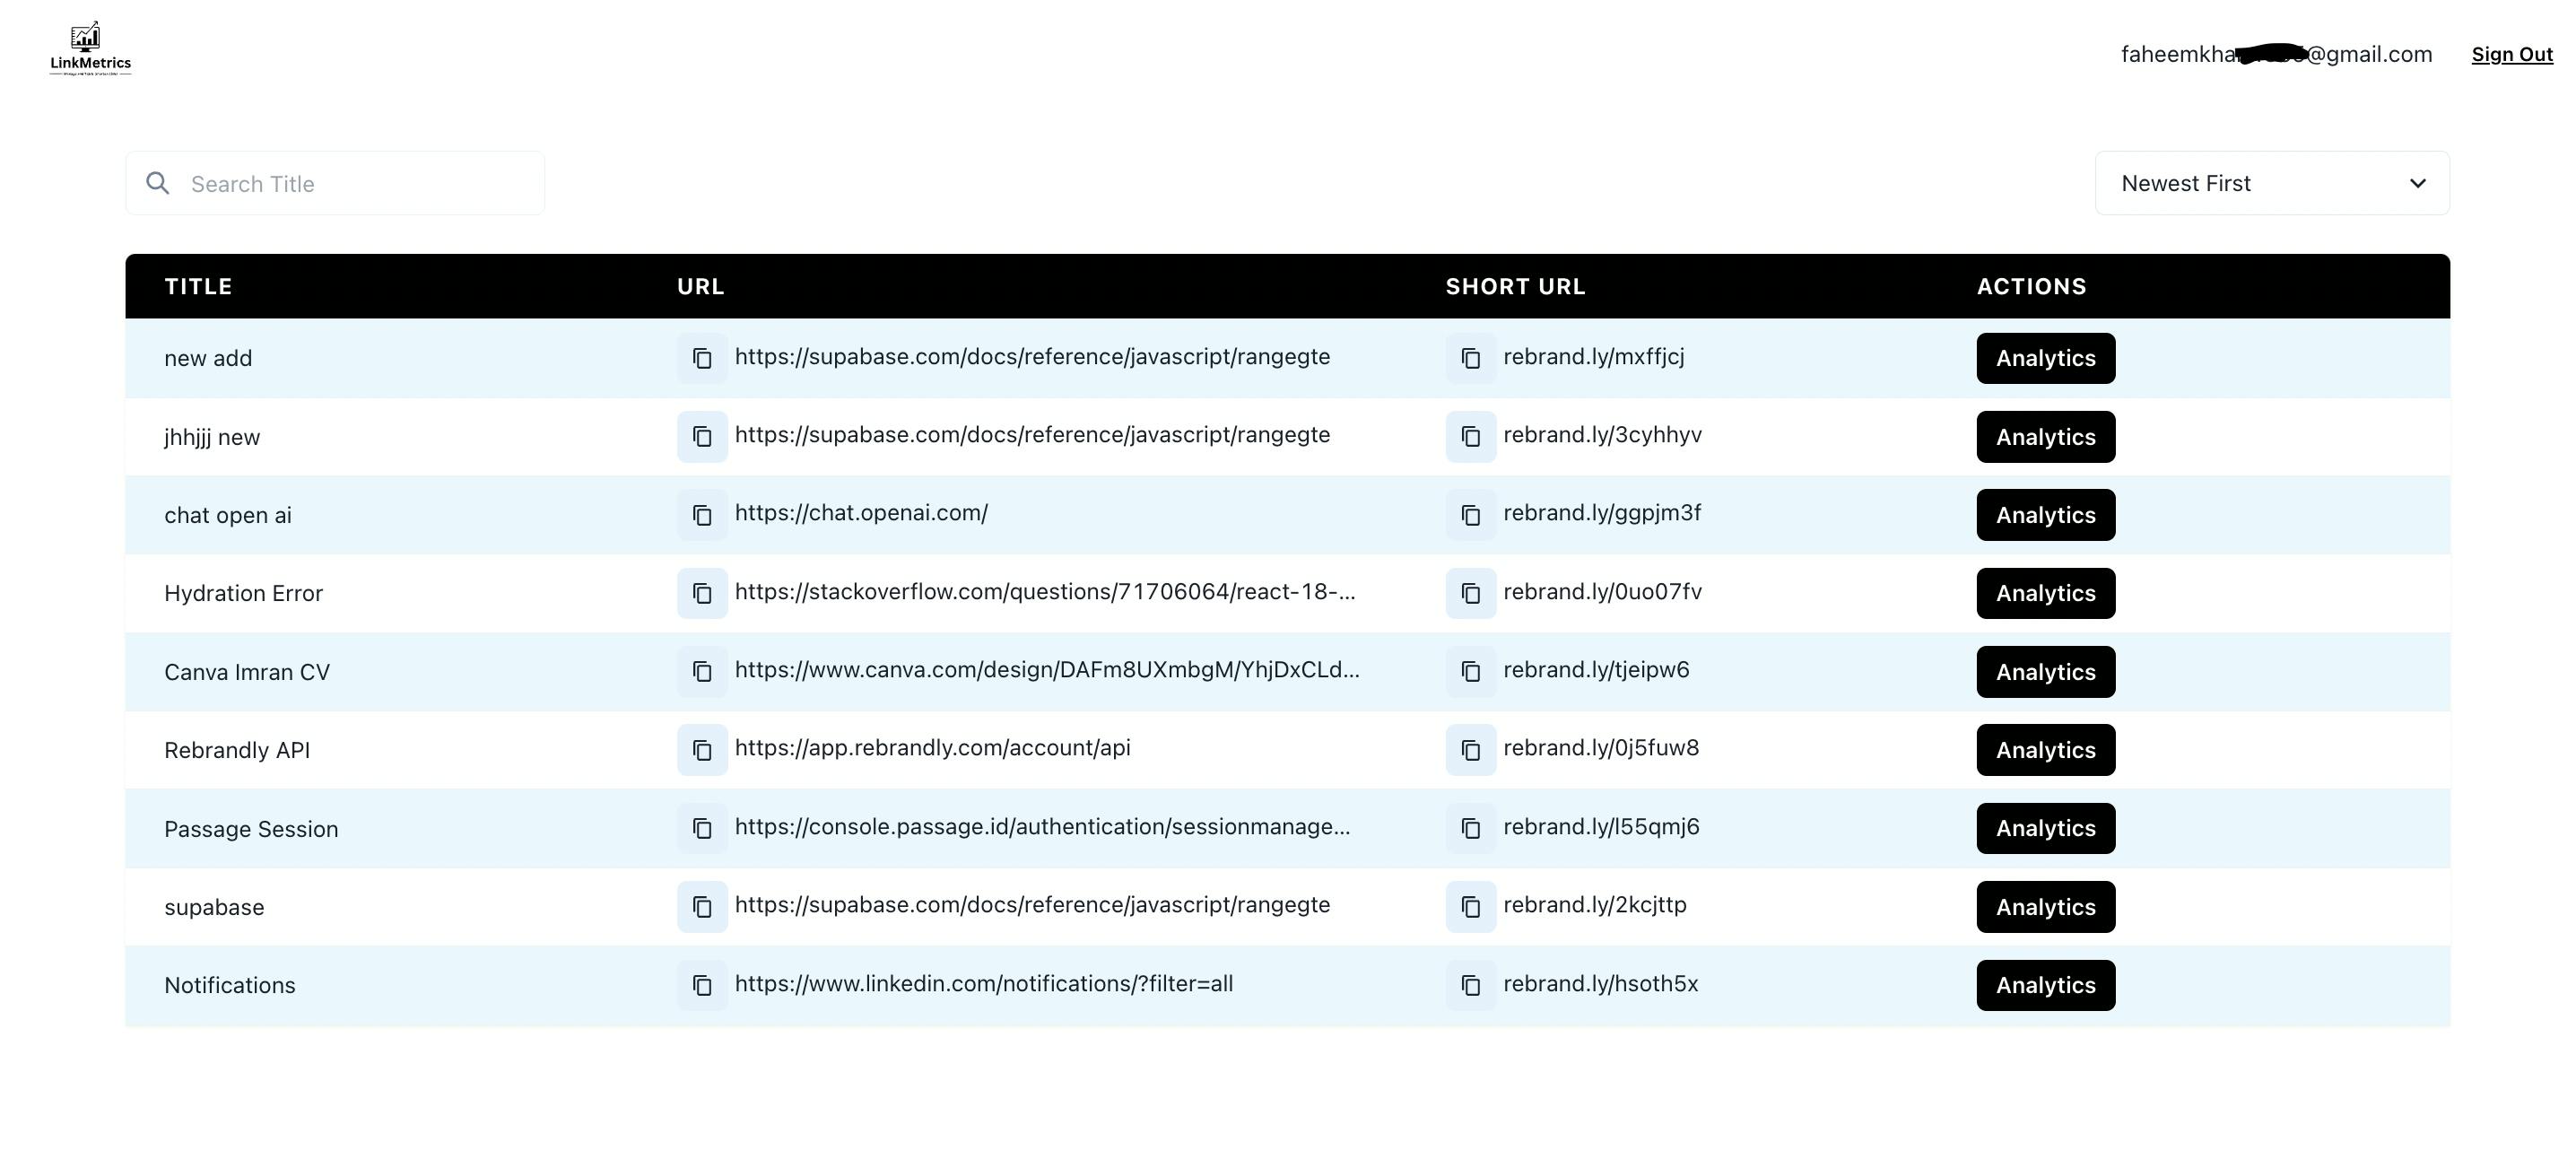
You can see the header component on both pages. I created this once and is reused on both pages. Here is the code for that header component.
import { Flex, Image, Text, Button } from "@chakra-ui/react";
import { HeaderProps } from "@components/utils/types";
import Link from "next/link";

const Header: React.FC<HeaderProps> = ({ username, signOut }) => {
  return (
    <Flex className="flex px-4 items-center">
      <Flex flex={1}>
        <Image
          alt="Link Metrics Logo"
          src={"/LinkMetrics.svg"}
          width="20"
          height="20"
        />
      </Flex>
      <Flex columnGap={6} align={"center"}>
        <Text className="text-sm">{username}</Text>
        <Button
          size="xs"
          variant="link"
          className="underline"
          colorScheme="brand"
          onClick={signOut}
        >
          Sign Out
        </Button>
      </Flex>
    </Flex>
  );
};

export default Header;
Inside the Header, we have shown the email for the currently logged-in user. We have a sign-out button to log out the current user. Here is the code for the logout functionality.
const signOut = async () => {
    try {
      await new PassageUser().signOut();
    } catch (error) {
    } finally {
      Router.push("/login");
    }
  };
The Landing Page
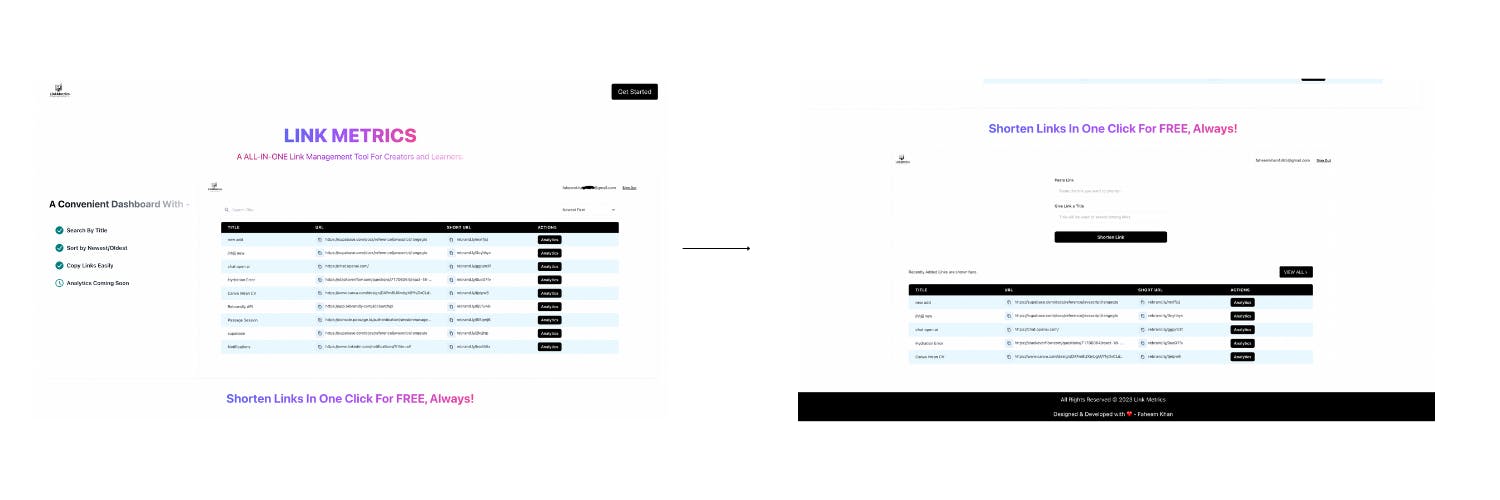
I designed and developed the landing page in the last hour. It came up great. I liked the colour combinations and images used on this page. Looks really professional 🔥
Analytics Tab
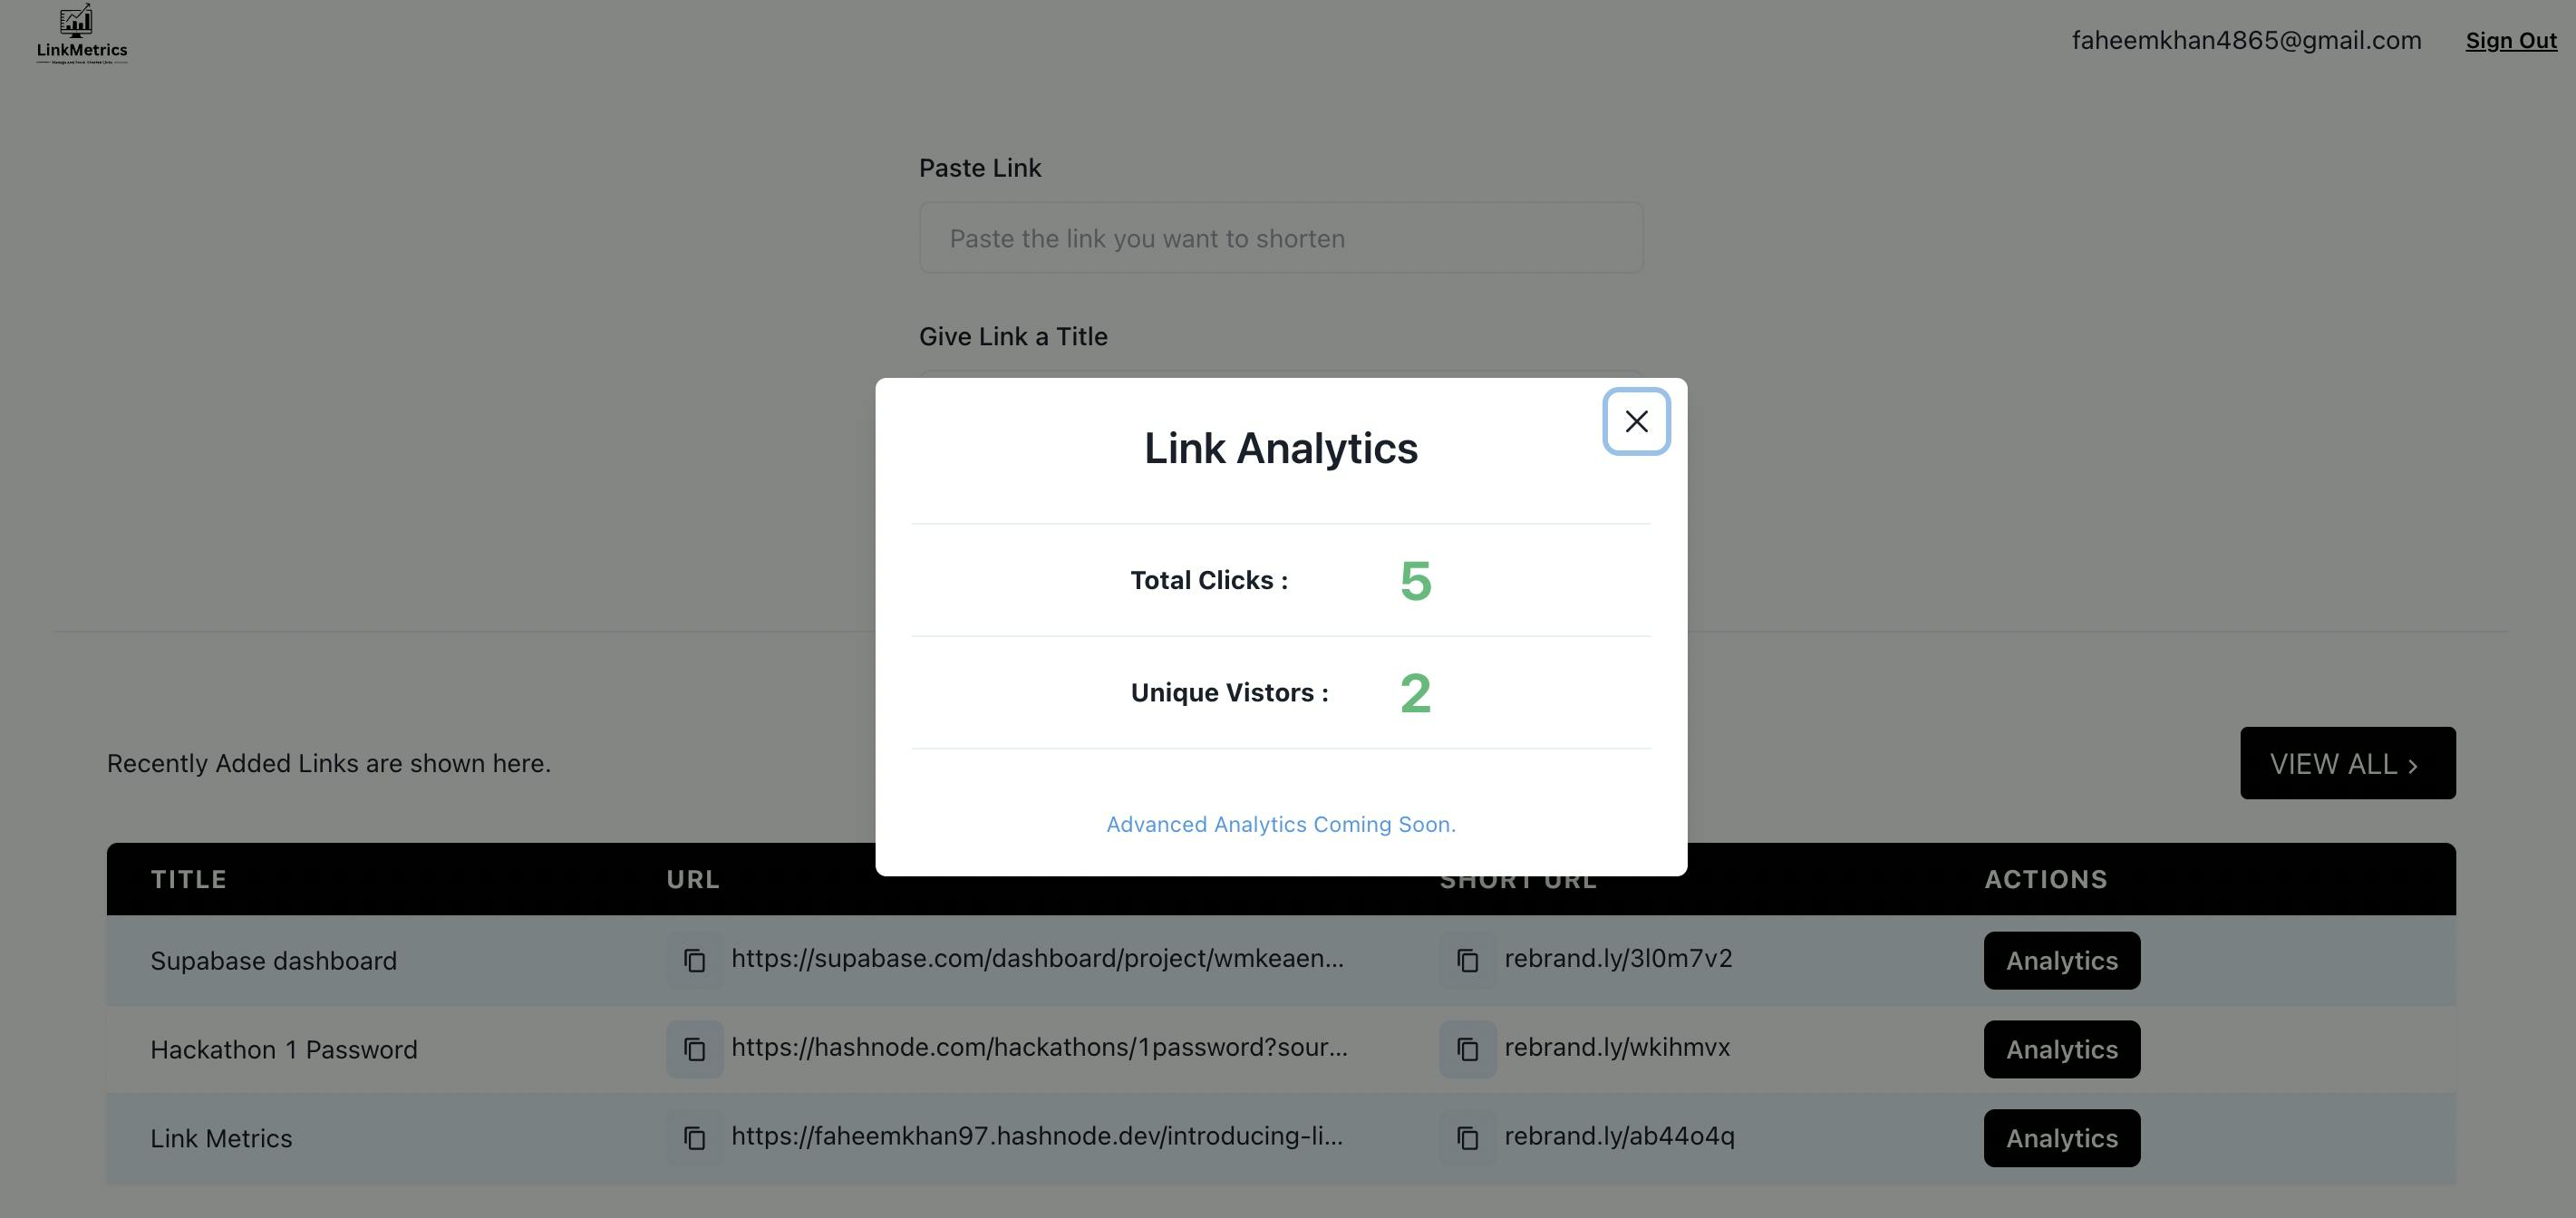
On click of the analytics button, a pop-up opens that shows total clicks and unique visitors for that particular link.
The Deployment
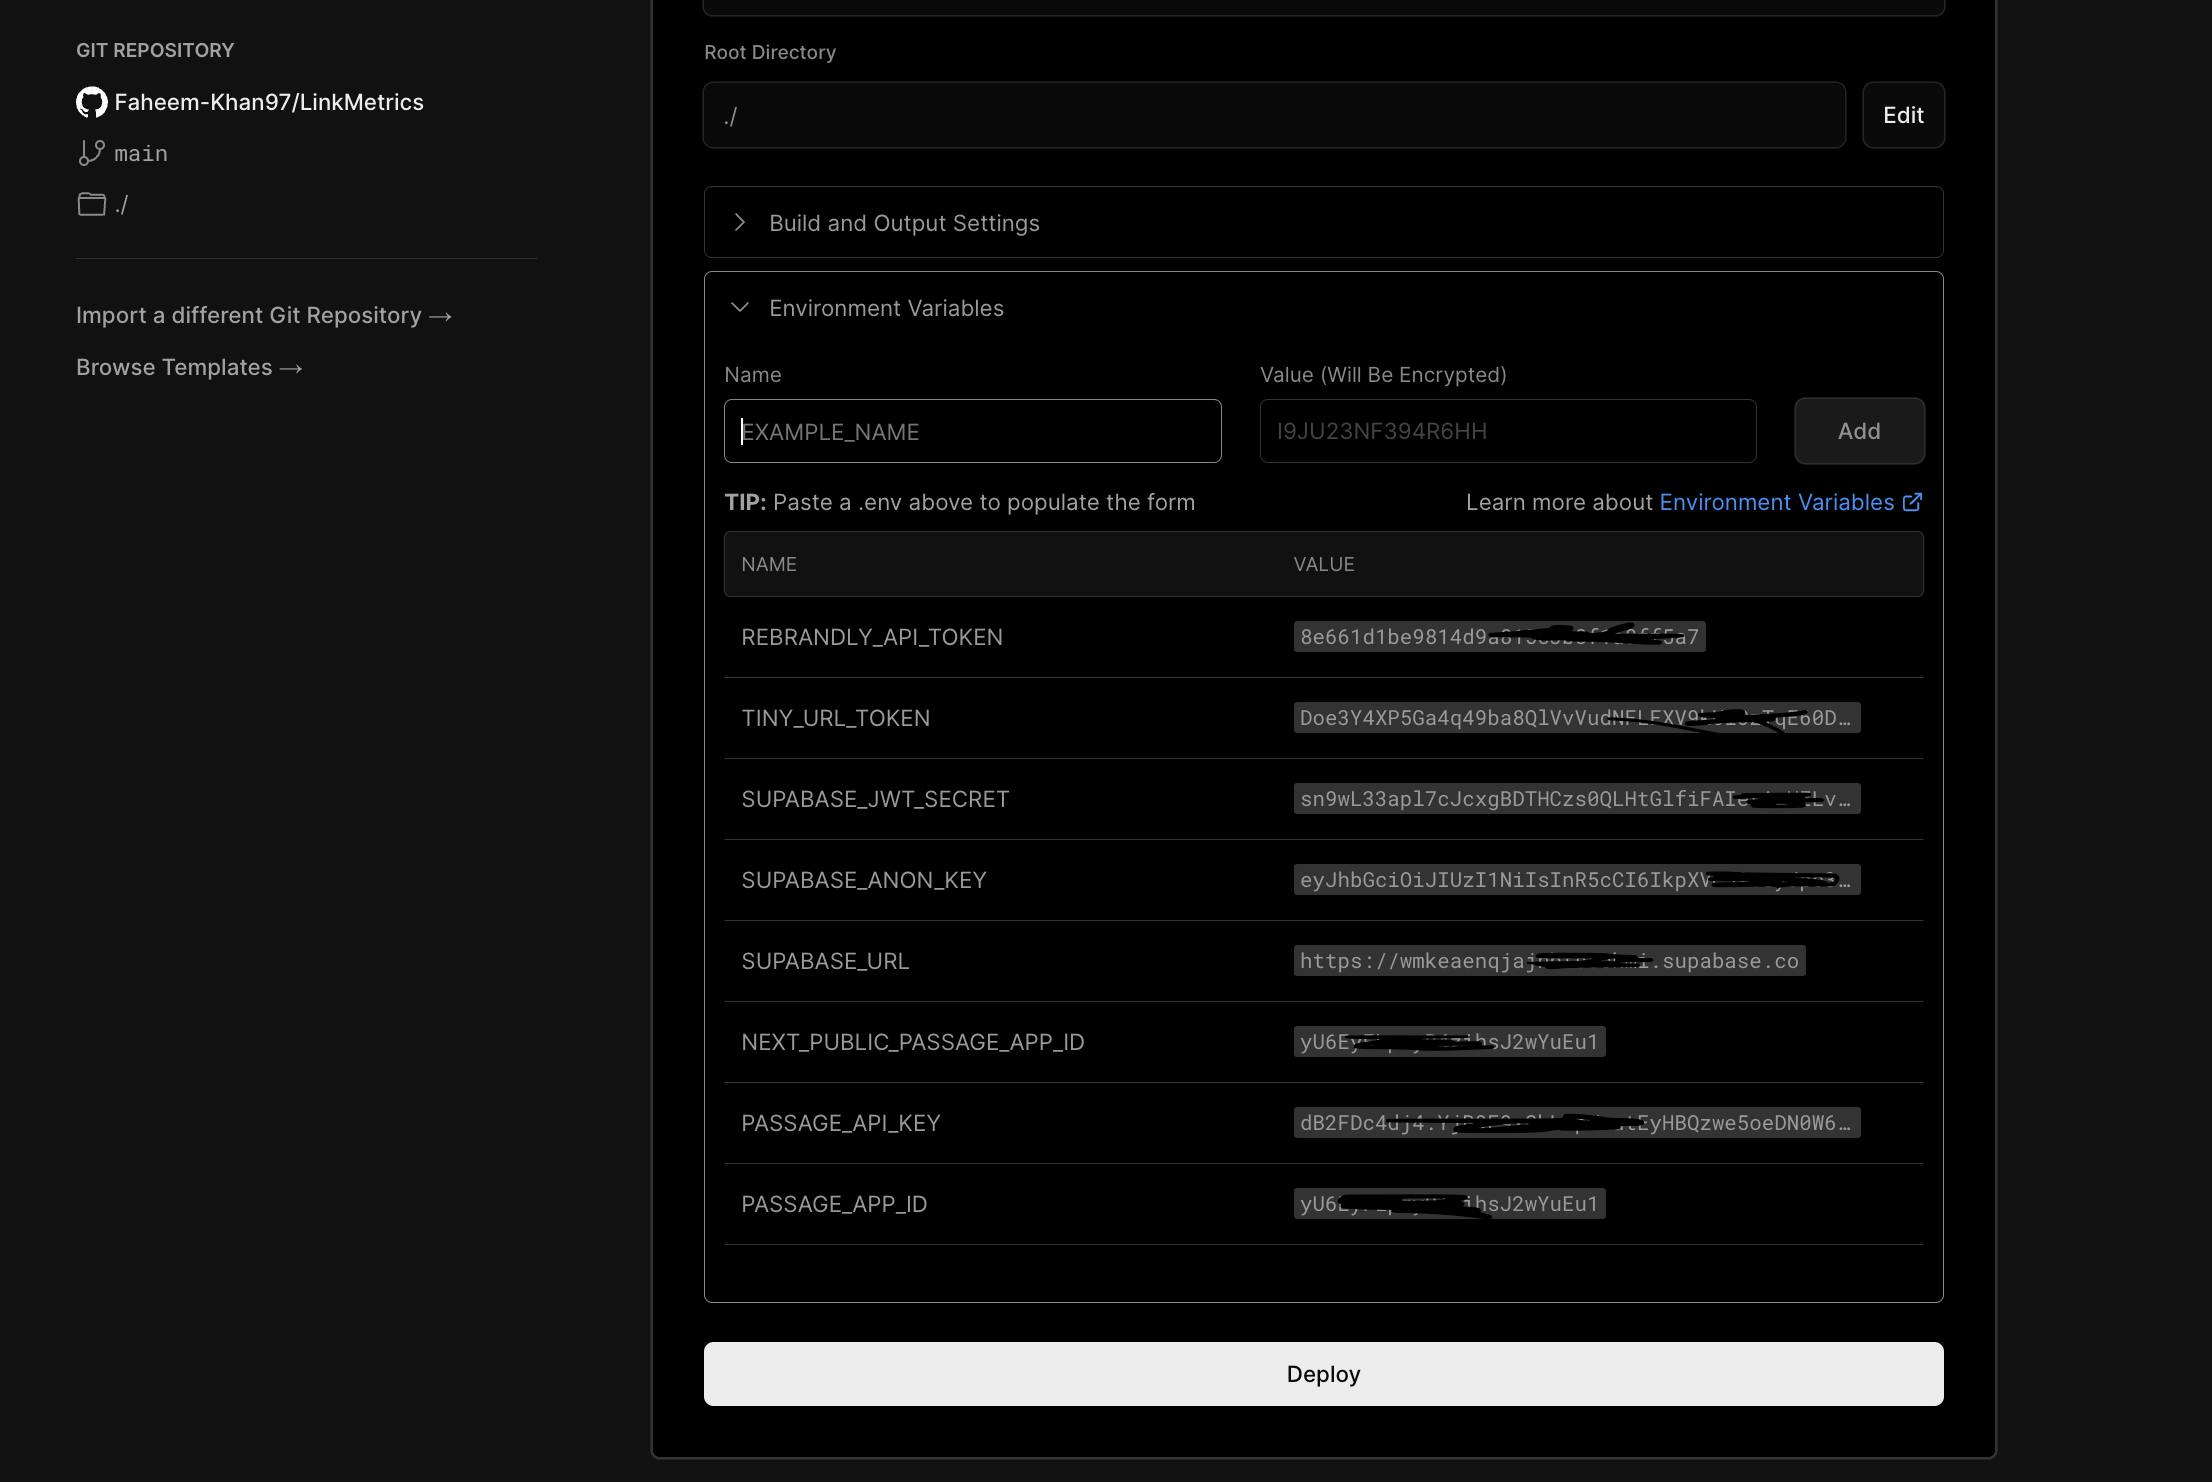
I deployed this web application for Free on Vercel. I like Vercel as it is very easy to use. I imported the Github Repo to Vercel, added environment variables, and deployed it in one click 🔥
These were all the steps involved, from design to deployment. I hope you find this article well enough to understand the project and the code.
What is Upcoming
The Analytics page but I need to pay for APIs.
More advanced Searching.
Downloading sheet of links.
Pagination on Dashboard.
This is all about this project. The time is ending so that's it.
Please find the Github repo and deployment link below.
Code - GitHub Repo
Web Link - LinkMetrics.vercel
This marks the end of this article. Thanks for reading through it all. I find this product quite useful. Hope you find it good too. Now, I will be waiting for the hackathons winners' announcement 😅
Bye, See y'all next time.
